Modem configuration guide to activate ADSL or Fiber internet connection, with Tim Telecom, Fastweb, Vodafone, Wind, Tiscali
 Buyers of a new modem may be surprised at how easy it is to configure itself to navigate the most common connections. The modems on the market have a wizard or a special function to configure the Internet connection in a completely autonomous way, making the installation operation really simple even for inexperienced users.
The ease of configuring a modem there should then be a further incentive to buy a new one and replace the old one or the one provided by the telephone operator (Telecom, Fastweb, Infostrada, etc.). Unfortunately, the automatic configuration is not always successful: in some scenarios we may not be able to navigate anyway, perhaps because the parameters used are different: in this case we will have to act manually to be able to navigate with the new modem.
In this guide we will show you how to configure the modem for all major connections and, in the final paragraph, how to navigate in the case of FTTC and FTTH optical fiber with a new modem different from that of the operator.
READ ALSO -> Best Modem to Buy (Fiber, Dual Band, Wireless AC)
1) Automatic connection configuration
Configuring a modem means activating the internet connection with your operator whose subscription you are paying for. This can be done with various telephone companies such as TIM, Vodafone, WindTre, Fastweb and others. Compared to the past we can always change the modem provided by the Internet provider, so you can choose a more powerful model or with a higher coverage.
Before using the automatic connection procedure, make sure that the modem is correctly connected to the network, checking the power cable and the telephone cable (RJ11); after this preliminary check we connect a PC to the modem via Ethernet cable and turn it on, paying attention to the LED signal lights on the modem itself.
After switching on the modem, we wait just 5 minutes for it to start and, using the PC connected to the modem, we open the web browser and log in to the modem configuration panel, typing in the address bar 192.168.1.1, 192.168.0.1 or others access addresses.
At this point, depending on the model of modem we have, we will be asked to set a new password or to log in to the modem with a name and password. These name and password are surely indicated on the instruction booklet or on the sticker under the modem itself and, usually, they are admin with blank password, name admin e password admin O admin password. I know we do not know the password to access the modem, we can always retrieve the credentials from our guide or by looking online for the modem manual.
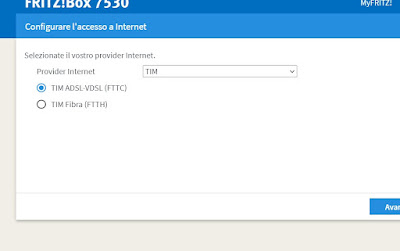
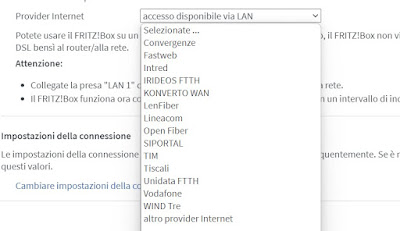
After accessing the modem configuration panel, we look for the function setup wizard or Quick setup and indicate, in the screens that will appear, the telephone operator with whom we have subscribed, confirming in the final screens that we want to use the default parameters.
At the end of the wizard we will have to be able to surf the Internet without problems, using the same browser we have used so far for the initial configuration. This procedure is also valid for FTTC and FTTH connections, but in some specific cases we will always have to contact the operator to be able to confirm the change of modem (since some apply filtering systems based on the Mac address of the modem).
To finish configuring the modem, you still need to make a little more effort and proceed with the configuring the Wi-Fi password, so as to generate a secure wireless network that is safe from hackers or Sunday scroungers.
In addition to the password of the Wi-Fi network, it is also advisable to change the password to access the new modem, so that it is not too simple (the security of the whole network is at stake).
2) Internet manual configuration parameters
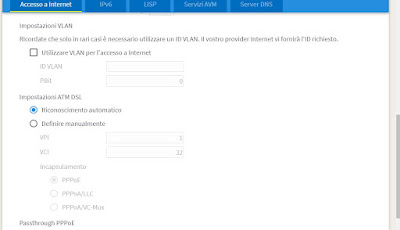
If the wizard does not allow us to navigate correctly, we will necessarily have to enter the connection parameters manually, also based on the provider we have chosen to navigate. To proceed, we open the modem configuration panel again, browse through the various menu items until we find the screen that allows you to set the connection parameters (usually called Internet or DSL, Access data, Modem O Connection).

ADSL
Within the configuration window you can use the following parameters:
- VPI: 8
- VCI: 35 (with Fastweb VCI it is 36)
- Connection type or Connection type: PPPoE for TIM, Vodafone and WindTre, while we use PPPoA per Tiscali; if we use an ADSL Fastweb line we will have to set the connection type Dynamic IP O Dynamic IP.
- Encapsulation Mode: for Tim, Vodafone and Fastweb is LLC while for WindTre and Tiscali it is VC-Mux (this parameter sets itself).
In addition to these parameters we also fill in the fields Username e password, which change depending on the provider:
- TIM o Telecom Alice: username and password are both aliceadsl.
- Wind Infostrada: username è welcome while the password is guest.
- Vodafone: username and password are both vodafonedsl.
- Tiscali: the typical email address must be used as the name @tiscali.it and the mailbox password.
- Fastweb: we can leave blank or set to No to the entry relating to access data.
As for configuring a modem with the Fastweb connection it is also necessary to open the web page https://registrazione.fastweb.it and verify the account by entering the various personal identification data.
If with Fastweb it is still not possible to surf the internet, it is advisable to follow the official guide on the Fastweb site relating to the modems supported by this provider.
3) Optical fiber (FTTC and FTTH)
With the arrival of fiber optic connections almost all operators push to use their modem, which immediately offers the connection and does not need to configure any parameters. If we really want to use a personal modem to navigate with the fiber optic connection we will first have to connect the modem to the classic telephone socket (FTTC) or to the ONT (FTTH), turn on the new modem and try using the wizard to immediately activate the Internet connection.

- We use 1036 as a parameter ID VLAN for Vodafone.
- We use 835 as a parameter ID VLAN for Tim, Fastweb and WindTre.
After configured VLAN access on the modem enter the access parameters (username and password) as seen for ADSL connections (except Fastweb, which does not require further configurations). If the modem connects to the Internet, access the control panel and configure the Wi-Fi as desired.
Conclusions
Modern modems are able to establish by themselves most of the connections present on the Italian territory, just use the wizard or the specific parameters for the chosen provider. For this reason it is worthwhile choose a supported modem in Italy or in Italian, so that you can use the procedures described above to establish the connection correctly.
If we don’t want to waste time with manual configurations we can always solve the problem quickly connecting the new modem to the operator’s modem, creating a LAN cascade.

