Guide to configure a connection between 2 routers and a cascaded modem, on the same line, without changing networks.

READ ALSO -> How to activate wifi router: all the things to do
Recommended reading before proceeding
For those unfamiliar with theoretical concepts on computer networks, I recommend a quick reading of these articles:
- What a router does
- Differences between modem and router
- Computer Networking Guide
Without reading the articles above, we may encounter some difficulties in configuring the modem and router, so let’s continue only if we are clear about the concepts expressed in the proposed insights.
Advantages of a cascade connection
The advantages of a cascade connection between modem and router are truly remarkable and they can make a difference when we connect to the Internet:
- Improved network performance without removing the older modem
- Connecting multiple devices (wired and wireless)
- Support for new network standards (WPA3 and Wi-Fi 6)
- Wi-Fi signal expansion
Obviously we will also find other advantages, but these change the based on the type of router we decide to connect to the main modem.
Preliminary operations
This guide assumes that the primary modem is also a router. If not, if you have a separate modem, the configuration does not change, but the modem should not be touched and this guide is intended on how to connect the main router (in turn connected to the modem) to a secondary one, in cascade ( as can be seen in the figure above). Before making any configuration it is advisable to write down some important parameters on the current network: find the IP address of the router (modem).
To do this we can open a command prompt on the Windows PC connected to the internet and type the command ipconfig /all to find the IP of the Gateway (ie of the router). From the result of the ipconfig command, the other network parameters, namely the Subnet Mask and DNS, which will be very useful as configuration parameters of the new router.
LAN-LAN configuration
To connect a new router to the main modem we have to set up the two devices for one LAN-LAN connection. To proceed, we use a PC to connect to the new router’s default network (you can use an ethernet cable or even Wi-Fi) and open a web browser to enter the router configuration screen, different for each model, but substantially similar for all. Once inside the router we proceed by configuring a new Internet access, making sure to set the router parameters as follows:
- The IP address of the router must be in the same range as that of the modem. So if the IP of the modem is 192.168.1.1, we put the new router as a fixed IP 192.168.1.200, which is almost certainly not used by any other device).
- As Subnet Mask leave the value equal to that of the modem it should be 255.255.255.0
- As Gateway put the IP of the modem (so 192.168.1.1).
- As DNS you can also put the IP of the modem or other DNS addresses such as Google (8.8.8.8 e 8.8.4.4).
- Change the Wi-Fi network name and network password, using the same name and password used on the old modem.
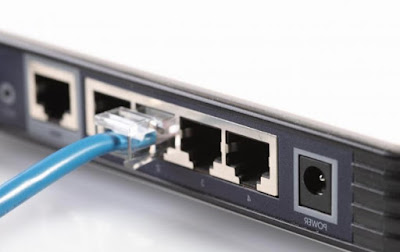
Once these changes have been made, connect to the old modem and disable the DHCP Server, other network functions such as NAT and Firewall and finally Wi-Fi; now we connect the old modem to the new router via an Ethernet LAN cable, making sure of connect a LAN port on the old modem and a LAN port on the new router. The final result will be to have the same network as before, with the same configurations, but enhanced by the new router. The old modem will only see one connected device (the new router), thus functioning as an old Alice modem with no routing parameters active.
To learn more we can also read our guide configure a wifi access point as a repeater.
WAN-LAN configuration
If you were not satisfied with the previous configuration or if we want to clearly separate access to the two networks of the modem and router (while maintaining the possibility of accessing both configuration panels) we can connect the modem to a new router with a LAN-WAN connection. The steps are similar to those seen above, only that when you have to set the IP of the router, this must also have the third number different from the IP of the modem. So let’s go back to the configuration panel of the new router and change the parameters as follows:
- The router must have as its address 192.168.2.1. In short, a new subnet will be created with a new set of IPs, completely separate from those of the old modem (which responds to the address 192.168.1.1).
- The Subnet Mask remains the same, that is 255.255.255.0.
- DNS and Gateway are automatically assigned, but we can still configure them by hand for more control.
- The DHCP Server, NAT and Firewall functions can be left active, although it is always advisable to disable those present on the old modem to avoid obstacles when we open the ports.
This time the connection with an Ethernet cable must be made using the WAN (or Internet) port of the new router. The new router will automatically receive all the access settings from the modem, while the network of IP addresses will be the one managed via DHCP by the new router, with address 192.168.2.X.
Configure the DMZ
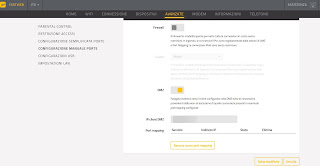
In the WAN-LAN configuration we can run into some problems when we have to configure the forwarding or port opening of programs on the router, because these must also be opened on the modem. In some modems we can brilliantly solve the problem by configuring the screen IP passthrough o DMZ.
By entering in the DMZ field the address that the old modem has assigned to the new router (better check directly from the control panel) the ports on the modem will all be open to the assigned IP, so as to be able to manage the authorizations and inputs of the port forwarding on the new router only.
Conclusions
Cascading still remains one of the simplest ways to expand network coverage and benefit from the new features of routers without having to change or replace the modem delivered by our operator at the time of signing the new internet contract. Personally I recommend that you always try the WAN-LAN configuration (if possible), leaving the LAN-LAN configuration only to connect old modems.
To learn more we can also read our guides Increase the wifi signal with two wireless routers networked together e Change modem with fiber even if constrained by the operator.
If we do not know which router to buy to make the waterfall, we invite you to read our articles Best router for fiber: which one to choose or Best Wi-Fi 6 wireless routers (IEEE 802.11ax), what they are and how they work.

