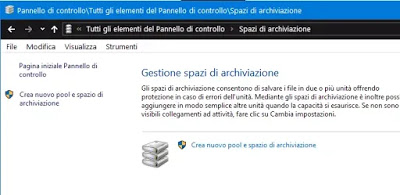
 Windows 10 really offers so many new features and improvements over previous Microsoft systems some of them rather hidden and not so simple to understand at first sight. One of these, which had already been introduced with Windows 8.1, is the one for creating new storage spaces namely group different types of disk drives, hard drives or SSDs or external USB drives into a single storage pool. Storage spaces are virtual drives which are displayed in the Windows Explorer as if they were real disks.
For example, if you have three 100GB drives each, you can use two to create a “lot (the pool) of storage” and then, once a new pool has been created, create a 200 GB virtual drive that represents the total amount of space available. It is also possible to create a 1000 GB virtual drive and as it begins to fill up when it is occupied for the available 200 GB, expand the real space.
What the storage space is for
It is possible to use storage spaces to create a single large network unit instead of sharing more units in the network. If you have several USB drives attached to your computer, you can combine them into a single logical drive, which allows you to organize all your data from a single point.
The real purpose of these storage spaces, however, is that of creating a security copy of the data so that, in the event of disk errors, it is still possible to recover and use the files that are replicated in the pool. You can therefore have a storage space with one Simple data copy on the same disk (but this way if the disk breaks the data is still lost) or configure a bidirectional mirror (write two copies of data on the units) and also a three-way mirror, with three copies of data on three different units.
Moreover, it is also possible to have a storage space similar to RAID 5 and the function of the parity.
I had already talked about these things in the guide to combine multiple disks into one volume.
Create storage space or storage pool
To configure storage spaces in Windows 10 you must open the Control Panel and find it in the list view of all the elements. Alternatively, you can search Storage spaces in the Start menu.
Once opened, on the first screen, you can select the units that you want to insert in the storage pool. All data currently present on the units will be deleted during the process, so you must use disks and USB drives that you are willing to erase. The unit must be at least 5 GB in size to be used in Storage Spaces and must not contain data in use on the PC. The user must have computer administrator rights to use this feature.
When creating, you must give a name to the storage space (virtual drive), choose the drive letter and the type of file system. For most people, NTFS will be fine, but if you really want an innovative choice you can opt for REFS (Resilient File System), a type of file system that maximizes data availability.
Then select the size you want to allocate (you can choose any size, it doesn’t matter if you don’t have real space available because you will receive a warning when it is time to add more space) and complete the process.
Storage space management
Once you’ve created storage space, going into “Manage storage spaces” you can see some useful information, such as the use of physical memory and the disk or USB drives involved.
At any time, you can always add more units to the pool to expand storage space or create other pools. You can also change the space assigned to a pool to increase or decrease it.
How to optimize disk usage
When adding new units to an existing pool, you can use the function to optimize the use of space by transferring some data to the added disks. Optimization occurs by default when you add a new drive to an existing pool when you select the option that optimizes the use of the drive to distribute existing data on all disks in the pool.
How to properly remove a drive-in use
From a storage space, it is not possible to simply disconnect a drive since you could lose all the data inside it. Windows 10, in the storage space management window, includes a mechanism to correctly remove a drive from a pool by moving the data on the other disks. After removing the drive, it will not be accessible through File Explorer and you will need to reformat it using the Disk Management tool.
How to delete a storage space
If you no longer want to have this storage pool created, you can easily delete it from the configuration and management window. Deleting a storage space permanently deletes the data it contains. Before deleting a pool, you still need to properly remove and disconnect any storage spaces that may have been created. Also, in this case, the units involved by the eliminated pool will have to be reformatted to be able to reuse them and to see them in the Explorer.
READ ALSO: Create a partition (volume) on Windows by dividing a hard disk into several parts
