At the moment, your finances do not allow you to buy one of those very expensive latest-generation camera phones equipped with incredibly advanced and high-performance multi-lens systems that, in different situations, are able to return shots worthy of a dedicated camera (device which, however, is the preferred choice for those who want to make professional shots).
In short, you are forced to “settle” for the camera of your dear old smartphone and this thing weighs heavily on you. I understand you, but you don’t have to worry: with the right tools and some practical precautions, you too could be able to pull out some interesting shots (technical limits permitting). How? By purchasing accessories that extent, as far as possible, the functionality of your phone’s lens (not its quality, therefore) and manually acting on the shooting parameters, using apps set up for the purpose.
So, would you like to learn more about the subject and find out in detail how to improve the phone’s camera? Yup? Very good: make yourself comfortable, concentrate on reading the next few paragraphs, try to put into practice the indications I am about to give you and, above all, try to implement the “tips” that I will give you. There is nothing left for me to do but wish you good reading and, above all, have fun!
How do you improve your phone’s camera
As I mentioned in the introduction to the article, it is possible to improve the phone’s camera by using some accessories – such as additional lenses and tripods – and using apps that allow you to manually set the shooting parameters.
Clearly, with the help of these tools it is not possible to improve the lens of your smartphone from a technical point of view, but simply expand some of its features and make some shots more pleasing. Clear? Well, then I’d say we can proceed!
Accessories
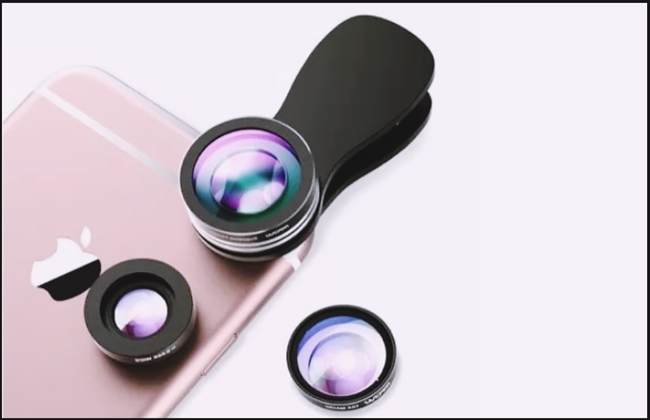
Among the accessories you can buy to try to expand the functionality of your smartphone’s camera, there are additional lenses, which can be installed on the cameras of your phone (usually via a clip mechanism) and which allow you to take advantage of more possibilities click.
Some of these additional lenses, in fact, allow having a wider wide angle and even the telephoto lens which, respectively, can be useful to immortalize a larger portion of the scene that is being captured or to try to photograph a subject more closely.
I want to tell you that the results that can be obtained with these accessories, generally, are not of excellent quality and, in any case, they are not even remotely comparable to those returned by the optics of real cameras. However, given these “little toys,” they cost a few tens of euros and are easily available both in the most supplied electronics stores and in online stores (like Amazon ), you can also think about experimenting with their use, at least to give a touch of originality to your shots.
Among the accessories that can be useful to improve the quality of photos taken with a mobile phone, there are also tripods, gorillapods, selfie-sticks and gimbal that are particularly useful for keeping your smartphone when taking a picture or shooting a video. Furthermore, some of these devices, such as gimbals with mechanical stabilizers, allow stabilized shooting.
Camera app
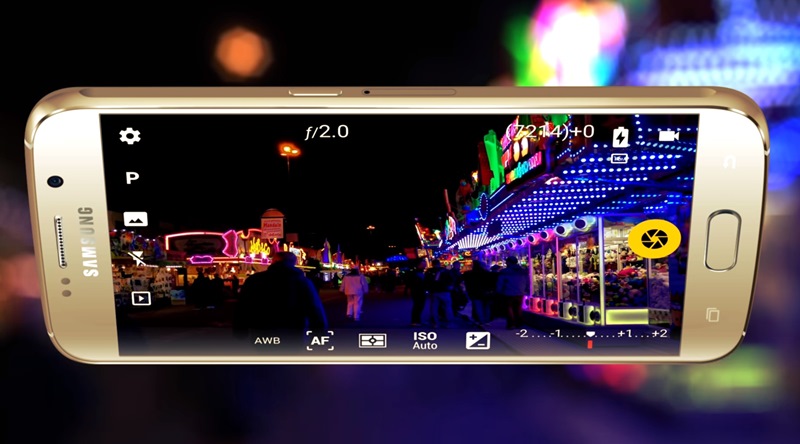
Even using the Camera apps, such as those that allow you to “manually” adjust some shooting parameters (eg ISO, shutter speed and aperture ), can be very useful for improving photos taken with the lens of your smartphone.
The use of these applications, such as Camera FV-5 for Android and ProCam or Halide for iPhone (the latter two both cost 7.90 USD), is necessary because the camera applications “standard” on Android and iOS do not allow to act manually on the shooting parameters. What parameters do I refer to? I’ll tell you right away.
- ISO sensitivity – this parameter indicates the degree of amplification of the electrical signal that is sent to the sensor cells. By increasing this value, the photos will be brighter even in low light conditions. However, given the “effort” that the sensor must make to return a brighter shot, do not increase the ISO value too much, otherwise “noisy” shots are obtained, characterized by a glossy effect that makes them unusable even if they are correctly exposed.
- Shutter speed – by increasing this value it is possible to “freeze” the scene and avoid hitting shots that show blur or micro-motion due to the movements of the subject or photographer. By decreasing the shutter speed, on the other hand, it is possible to make brighter shots (since the light will have more time to hit the sensor) and also create special effects, such as the artistic blur I told you about in another article published on my blog.
- Maximum aperture – this value indicates the amount of light passing through the lens and is measured in f -stop (eg f / 1.5 or f /3.5, etc.). The lower this value, the more light will enter the lens, generating brighter shots. I warn you that most photo apps do not allow you to adjust the aperture but, if you find one that allows you to do so, you will know how to set this parameter.
- White balance – if you want to take shots that have accurate color tones, it is important to correct the color casts with the correct white balance.
Tips for taking photos with the phone
After finding the accessories and apps through which you can improve your smartphone’s camera, let me also provide you with some tips for taking photos with your phone. I am sure that by following the “tips” listed below, you will learn how to take pictures that are objectively better.
Clean the camera lens

Perhaps it will seem obvious to you as a recommendation, but cleaning the lens of the camera is of fundamental importance to make good photos with a mobile phone. Since the lens is one of the parts that get dirty more easily, you should do this regularly, so as to eliminate stains and halos that would negatively affect the quality of the shots.
To carry out the cleaning operations, use a microfibre cloth or a cloth in deerskin or, again, a chamois leather cloth. I recommend that you do not use abrasive cloths, paper towels or compressed air products for any reason, as you may cause irreparable damage to the lens. Then don’t tell me I didn’t warn you!
Once you have found what you need, take the cloth and rub it gently on the camera (both the back and front) by making circular motions. Try, then, to look at it against the light to check that it is clean and, if necessary, repeat the operation until you get the desired result.
Use the right light
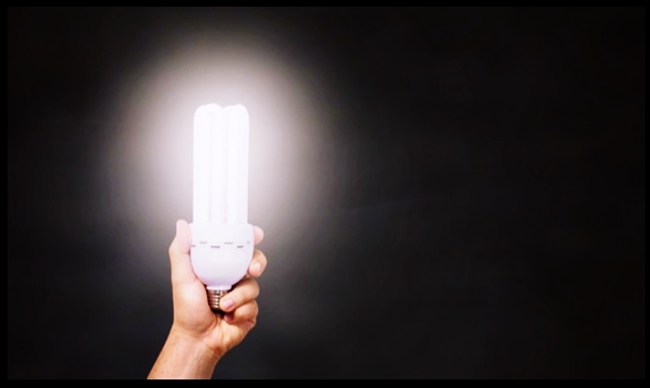
Using the right light is of fundamental importance to get the best out of your camera. Without good lighting, in fact, the photos or videos made with the smartphone could be underexposed (or too dark) or, on the contrary, overexposed (or too bright).
Therefore, try to correctly balance the lighting by finding a location where the light is neither too little nor too intense. Using the apps I told you about in one of the previous chapters, you can try to manually adjust some parameters, so as to correctly expose the scene.
If you find yourself in a dark location, you can get a correctly exposed photo by slightly increasing the ISO value and exposure times. On the contrary, if you find yourself in an excessively lighted place, you can minimize the ISO value and also reduce exposure times.
Do not use digital zoom

Do you want to take decent pictures? So forget about the digital zoom! The digital zoom, in fact, is a simple digital enlargement of the photo, which for this reason makes the subjects portrayed in the shot remarkably clear. The optical zoom, on the other hand, brings the subject of the image to be immortalized thanks to optical and mechanical elements that shorten or lengthen the focal length, based on the photographer’s wishes.
At the time of writing, the optical zoom is present only on some top-of-the-range smartphones, such as those from Apple and Huawei, and is obtained by using a game of lenses from the rear cameras: if you have one of these devices, use the optical zoom as well to get close to the subject you want to photograph; otherwise, do not use the digital zoom for the reasons I explained to you earlier.
Set the maximum shooting/recording resolution
Setting the maximum available shooting/recording resolution can help to create quality photos and videos, avoiding having to work too much in post-production, running the risk of running into content full of artifacts. To set the maximum shooting resolution available, do the following.
- On Android – launch the Camera app, tap on the gear icon at the top, click on Photo Size and select the highest resolution available (eg 16MP ). To change the resolution of the videos, instead, from the same menu, you tap on the item Video resolution and select the maximum resolution available on your smartphone (eg FHD, QHD, etc.). Please note that the terms may vary slightly depending on the brand and model of the device you have and the version of Android installed on it.
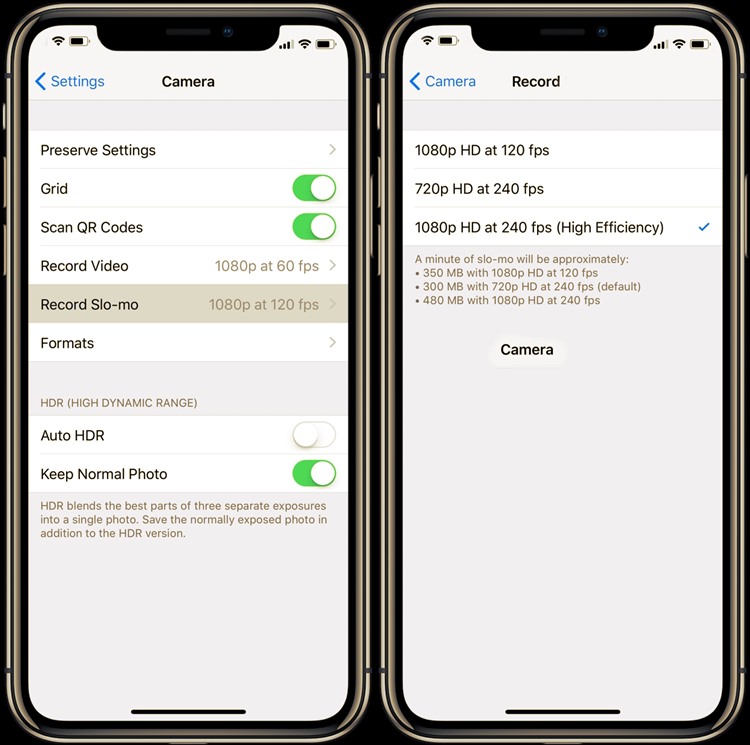
- On the iPhone – on the iPhone, it is not possible to change the size of the photos (which is already set by default to the maximum), but only that of the videos. To do this, go to Settings> Camera> Record video and select the maximum resolution available (eg 4K at 30fps ).
I point out, however, that setting the maximum quality of shooting/recording does not guarantee the achievement of better results in terms of quality, much depends on the technical characteristics of the lenses mounted on the smartphone. Maybe you test with the various settings available and evaluate what to do.