 When we buy online we will be asked for the credit card or prepaid data in our possession: we will have to enter the card number, expiration date and (for security purposes) also the 3-digit code saved on the back of the card (CVV ). Repeating these steps each time can be frustrating, especially to remember the card number: we will inevitably have to recover the wallet and check that the data entered is correct. But from today we can speed up the addition of credit card information taking advantage of the automatic compilation offered by Google Chrome which allows you to speed up online payments and securely enter credit card information in the required fields without having to recover the physical card each time., both on PC and on a smartphone.
To increase the security level of this operation we will also show you how to add a password to your account in Google Chrome (to avoid unwanted purchases by relatives or friends) and how to take advantage of an online service for saving and protecting this data. delicate.
READ ALSO: How to protect payments and contactless cards from technological thieves
Add a credit card in Chrome
To add any credit card (also Bancomat or prepaid as Postepay) we open the Google Chrome browser, click on the three vertical dots at the top right and then bring us into the menu Settings. In the new tab that appears, click on the item Payment methods (present under the section Automatic compilation) and select the button to add.
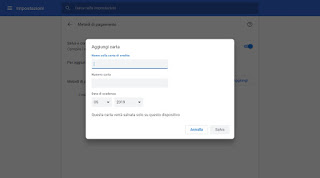
In the window in the foreground, we will be asked to enter the name of your choice for the credit card, its number (ie the PAN, the sequence of numbers that allow you to use the card online) and the expiry date. Once all the data has been entered, we perform a final check and click on Save.
Back in the card management screen, make sure to activate the button next to Save and complete payment methods, so as to allow Chrome to fill in the fields with the credit card inserted. If we have more than one credit card, we can insert it into Chrome without any problems: at the time of payment, we will be able to choose, in a small drop-down menu, which card to use.
NOTE: for security reasons Chrome does not allow saving the CVV, which we will, therefore, have to remember from memory each time we use the card. This is necessary to avoid computer scams since the data entered in Chrome is useless without the CVV.
How to remove or change a credit card in Chrome
If a credit card has expired or is not accepted at the time of payment, we can change it or remove it from Chrome by returning to the menu Settings -> Payment methods and clicking on the three dots next to each added credit card.
Using the key Edit we can make changes to the card number or expiration date while using the button Remove we will delete the card from Chrome.
How to synchronize your credit card with Google Pay
The cards inserted in Chrome as seen above are exclusively linked to the machine (and browser) in use. If we want to carry credit card data on all the PCs or smartphones in our possession, we will have to add the card to the Google Pay service, using the synchronization account in use on our browser.
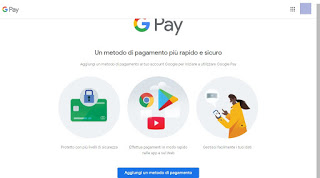
First, let’s take us to the Google Pay page, we log in with the Google account we intend to use and then click below on Add a payment method.
We insert the card number, the expiration date and the CVV (this time it is required); now our card is added to the payment circuit managed by Google and can be used on any Google Chrome synchronized with our account. If we haven’t done it yet, let’s go to the Google Chrome window, click on the account icon and then on Enable synchronization. We now insert the credentials of our Google account: automatically all payment methods added to Google Pay will also be available on the browser, without having to enter the data each time by hand (both in the respective payment fields and within the management included in the browser ).
READ ALSO: Synchronize browser data and passwords on each device
How to protect Chrome with a password
Is the computer we use shared with other users? It may be a misconception to leave the credit card information available without a minimum check: a relative of ours or a friend could take advantage of it without our consent.
To remedy, we recommend use Chrome only on a secure Windows account (entering a lock password) and leaving a Guest account or an account with a different name when using all other Windows users. If instead, we wanted to integrate the block in Google Chrome, we advise you to install the PassBrow extension.
To deepen the discussion on the Windows block and the block by extension, I refer you to reading our guides Protect access to the Windows PC with screen lock and password is Lock Chrome with the password to protect private data.
LastPass: free and valid alternative with cloud synchronization
If instead, we are looking for an alternative to the credit card management system, we advise you to focus on the service offered by LastPass.
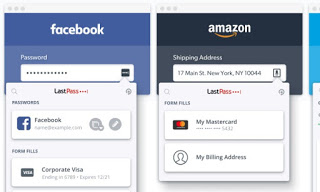
The service is available as an extension for all the main browsers and as an app for Android and iOS and allows, in a few simple steps, to save credit card data, so that it can be used wherever it is needed (through automatic compilation). Credit cards managed through LastPass are protected by a Master Password, necessary to be able to use the stored data: until we enter this password our data will be secure, encrypted on a protected server.
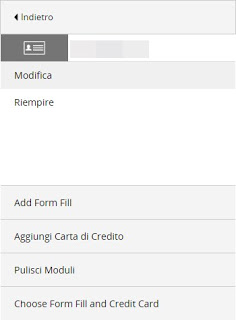
To add a credit card, we install the extension on the browser in our possession, click on its icon at the top, enter the login credentials for the LastPass account then take us to the menu Form filling -> Add Credit Card.
We fill in the required fields and confirm; on the next site where we will be asked for payment information, LastPass will ask us to enter the main password and automatically enter the card data requested by the site.
To learn more about LastPass and how to use it to save the login credentials of the sites, we advise you to continue reading our guide Store passwords and logins to websites safely and securely.


