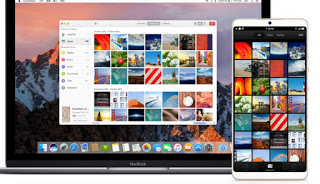
Let’s see in this guide how to add android photos on a mac so that we can save them in the internal memory of the Mac with the same ease with which we move photos from Android to PC.
How to move Android photos on Mac
The methods that we will show you below will allow you to access the photos and images on the Android smartphone directly on the Mac, without having to access the PC with Windows 10 each time to perform this operation.
Transfer photos with Google Photos
The easiest way to add Android photos on Mac is to use the Cloud sync system offered by Google Photos, already present on all recent Android smartphones.
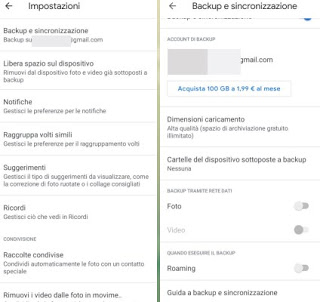
Once the app is opened on our phone, make sure to use the same Google account already configured (to download the apps or to access Gmail), we open the side menu by pressing on the top left of the icon with the three lines, we press on Settings and finally on Backup and synchronization.
We activate the button next to the item Backup and synchronization, so as to activate the automatic saving of photos taken with the smartphone camera.
To add more folders to the synchronization we press on the menu Device folders backed up and activate the switch next to the folders with images already detected by the app.
We wait for all the photos and images to be synchronized on the cloud (it may take some time, but we can speed up the operation by connecting to a fast Wi-Fi), then let’s go to the Mac and install the Backup and Sync app, opening the previous link directly on Safari or any other Mac compatible browser.
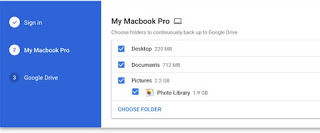
At the end of the download, we open the downloaded DMG file, drag the app icon into the folder Applications and start it from Launchpad when finished. In the home screen we enter the login credentials of our Google account (the same used on the Android smartphone) and, in the next folder, make sure to also synchronize the Images folder in the Mac gallery.
We confirm where necessary and wait. In a few minutes, all photos and synchronized images will be available in the folder GDrive -> Google Photos, which we can open either from the Finder or by pressing the app icon at the top right.
To learn more about the operation of Google Photos and automatic synchronization we can also read our article on Google Photos app with unlimited backup from Android, iPhone, and PC.
Transfer photos via USB cable to Mac
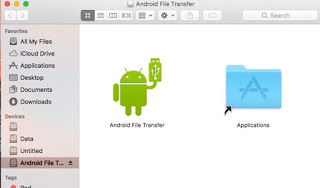
In order to move photos from the internal memory of the Android smartphone to the Mac via cable, we will first have to install the Android File Transfer app on our Mac.
Again, download the DMG file, open it, and drag the app icon into the folder Applications.
At the end of the installation, connect the Android phone via USB cable to the Mac, open the Launchpad, search for the app Android File Transfer and start it; in a few seconds we will have access to the internal memory and any microSD memory present on the Android device, so you can add Android photos on Mac with a simple copy and paste between folders.
Transfer photos wirelessly (Wi-Fi)
We don’t want to use any cables to add Android photos on Mac? In this case, we can rely on a Wi-Fi synchronization service such as that offered by AirMore, available for free for all Android devices.
After installing the app on our smartphone, open it, press the button Scan to connect, and go to the Safari browser on the Mac, from where we will have to open the AirMore Web site. Inside the site, we scan the QR code shown and wait a few seconds: the smartphone management screen will welcome us.
Now that the smartphone is connected to the Mac, we press on the icon Images, wait a few seconds, and scroll through the various albums.
To move photos on the Mac, select them one at a time or use the buttons Group for months or Select all at the top right, then we press the button Export.
The browser will start downloading a compressed ZIP file containing all the photos on the Android smartphone so that you can add them to the Mac Pictures folder at any time.
Other apps similar to AirMore can be viewed and tested in our articles Send files between PC and Android (mobile or tablet) in wifi without cables is Transfer even large files from PC to a smartphone in Wifi.
Conclusions
If so far you thought that an Android smartphone was not possible to manage it from a Mac system, you have to change your mind: using the synchronization system offered by Google or some apps dedicated to the purpose we will be able to add Android photos on Mac with the same simplicity that distinguishes PCs with Windows 10.
Want to take advantage of WhatsApp and Telegram chats to move files and notes to Mac? All we have to do is read all the details in our guide on how Transfer files to the cloud of Whatsapp and Telegram.
If instead, we wanted to transfer files between two Android smartphones we can use Wi-Fi instead of Bluetooth, as seen in our article on how Transfer files between Android phones.


