
If we want to avoid losing everything when you change your mobile phone or if you need to reset and restore from scratch, we can do it a backup to save the data kept on our trusty iPhone, using both the tools built into the phone and using a computer and iCloud. Let’s see then how to backup an iPhone.
For Apple iPhone mobile phones we can use different options to save photos, contacts, calendars and messages: iCloud on the phone, iTunes from a PC or use one of the third-party programs designed to save every personal file and every app on the Apple device.Backup iPhone via iCloud
iCloud is Apple’s cloud-based storage system, already integrated into the device (we won’t therefore have to install apps). Apple only grants 5 GB of free space for each user, so use it sparingly. To activate this backup, let’s open the app Settings, we tap on our Apple ID at the top, then let’s go in iCloud.

We can start creating our backup by activating the buttons next to the items in the section Apps that use iCloud; in particular we recommend to activate Photos, Contacts, Calendars, Messages e Safari, so as to save a large part of our multimedia content and browser favorites online. If, on the other hand, we intend to make a complete backup of the phone (complete with app and operating system), we will have to scroll through this window until we find the item Backup iCloud, enable the item Backup iCloud and tap on Back up now.
The backup thus created will be saved in iCloud as soon as we are connected to a Wi-Fi network (given the size that the file can reach, it is better to be connected to a fast home network, avoiding the use of hotspots). With iCloud you can back up your iPhone or iPad online which is largely automated, so we will not have to do anything special if not often connect to a fast wireless network, so as to always synchronize everything.
To restore a backup made via iCloud, we enter our credentials on the restored iPhone, check that there is a compatible backup in the path Settings> [il tuo nome] > iCloud> Manage Space> Backup so let’s get in Settings> General> Reset and press on the item Initialize content and settings.

In the next screen we select Apps and data, we touch on Restore from iCloud backup and, after confirming our access data, we choose the most recent backup to restore on our device.
Backup iPhone con iTunes per PC
If we want to make a backup on our PC, we will have to use iTunes, available for Windows from the official site.

Once iTunes is installed, connect the iPhone via USB cable to our computer, start the program and, after a few seconds, click on the small symbol in the shape of a telephone, present under the heading Checks, so let’s get into the section Backup.

We put the check mark on the item This computer, then we press the button Back up now to save a working backup on your PC. If we want to add a password to our backup, we can do it by placing the check mark (before performing the actual backup) to the item Local backup encryption and choosing the password by clicking Cambia password.
If, on the other hand, we want the backup to be carried out automatically every time we connect the iPhone to the PC, make sure to put the check mark on the item Automatically syncs when iPhone is connected.
To restore a backup saved with iTunes, connect the smartphone restored and previously connected again, let’s go to the same screen, choose This computer, we indicate which backup to restore then click on Restore backup.
If, on the other hand, we have an iCloud backup and want to restore it via iTunes, all we have to do is connect the restored iPhone to the PC (via USB), click on the phone symbol at the top then put the check mark on the item iCloud, present under the section Backup.
After selecting the item, we click on the side on Restore backup, so as to be able to recover the previously saved backup from the Internet and start the restore procedure, so as to have our iPhone ready to use.
Backup iPhone da Mac
On the latest versions of the Mac, the iPhone can be managed via the Finder app: to make the backup then we will have to proceed in a different way compared to Windows (where instead it is necessary to use iTunes).
To backup the iPhone, connect the latter via USB cable to our Mac or MacBook, open the app Finder and press on the name of the iPhone in the left part of the window.

In the new window just click on the button Back up now, so you can back up your iPhone and save it in the Mac memory.
For the reset we will not have to do is open the same screen and this time use the button Restore backup, from which it will be possible to choose between the various backups we have made in the last period.
Backup via third-party apps
If the previous two methods have not convinced you, we can use the backup system offered by a program like dr.fone, available for free for Windows PC and Mac.
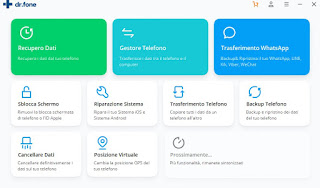
Once the program has been downloaded, connect the iPhone to the phone via USB cable, open the main software interface and press the button Phone Backup. A new screen will open where you just need to press the button Backup and choose the items to save to start the safe saving in the internal memory of our computer.
To restore a backup made previously, all we have to do is connect the iPhone to the computer again, open the program, click again on Phone Backup and select the item this time Restoration, so you can choose the backup and the items to restore.
To discover other similar programs, we invite you to read our guide sync iPhone or iPad with PC without iTunes, so you can always have a valid alternative to back up your iPhone.
Conclusions
In this guide we have shown you all the methods we can use to make a complete backup of our data and the operating system on iPhone, both using the tools offered by Apple itself and using a convenient third-party program that can be very useful as a backup. secondary or as an emergency backup.
In order not to waste space (since 5GB is frankly few), we can backup other things, such as photos, using other much more “capacious” apps, such as those recommended in our guide to apps that automatically backup photos taken with the camera; the best app is for sure Google photo, since it offers unlimited space to a predetermined quality.
If, on the other hand, we wanted to switch from iPhone to an Android phone, we recommend that you read our guide Transfer Contacts, Photos and Apps from iPhone to Android on the new smartphone.