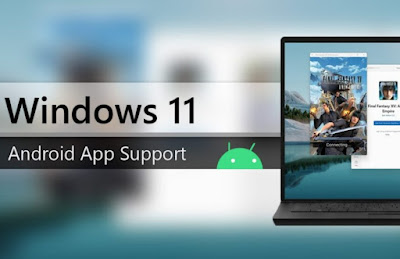
 Among the features provided by the new Windows 11 certainly stands out the support for Android apps, which can be easily installed on the system and used as if they were real PC programs, without having to install dedicated emulators or virtual machines. This function can be very useful for trying out new apps for phones or tablets or (as per Microsoft’s idea) to provide valuable help to Android developers, who can thus develop on Windows 11 and immediately try the app within the operating system. .In the guide that follows we will show you how to install android apps on windows 11, avoiding the use of procedures that are too complex or difficult to apply in the home. If the recommended tool for Windows 11 is not enough for the purposes we have set ourselves, we will also show you how to install the best emulator for android, so as to get even more functions (even on Windows 10) in addition to support for the Google Play Store.
READ ALSO -> Windows 11 settings to change immediately
Preliminary information
In order to use WSATools on Windows 11 you need to install ADB on your computer and set it as an environment variable, so that all apps that need ADB can use it without the hassle. In order to install ADB we recommend that you read our guide for install ADB on Windows (also Windows Subsystem for Android), so you can use the tool.
To install the apps we will also need to enable developer options from Windows Subsystem for Android. We can proceed with the change by opening the Start menu, searching for Windows Subsystem for Android and activating the Developer mode (The Developer mode). Again to facilitate the launch of the apps, we select Subsystem resources (The Subsystem resources) and press on Continuous (The Continuous).
The Android app is Windows 11
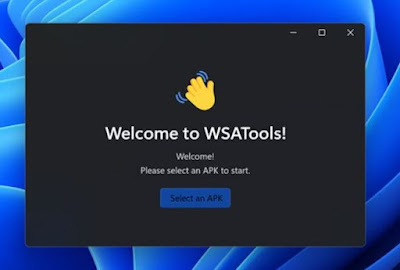
Now that we have the system set up we can APK di Android on a PC with Windows 11. To proceed we open the Start menu, look for the Microsoft Store app and start the search for the WSATools tool, which greatly speeds up the installation of Windows Subsystem for Android and Android apps.
At the end of the app installation we open the Start menu again and look for the app WSATools. We will find ourselves in front of a simple interface, where it is sufficient to press the button Select APK (The Select an APK), browse the system folders where the APK we want to install on Windows 11 is present and, as soon as the interface allows it, press Install to add it to the system.
If the app is compatible with “smooth” Android (without Google apps and without Google Play Services) we can start it like any other Windows program: open the Start menu and start the app installed via APK, so you can view it within an optimized window (about the size of a modern smartphone).
An even better program for installing Android apps in Windows 11 is WSA Pacman which you can download for free from Github. WSA PacMan is a GUI for ADB commands and is based on the original Android Windows Subsystem environment and allows you to install apps via APK files quickly and easily.
Where to download the APK files
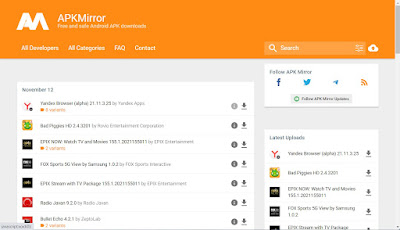
We don’t know where to get APK files to install Android apps on Windows 11? A good place to start is APKMirror, where practically all the APK files of applications available for free from the Google Play Store are present.
To download the APK apps from this site we use the search engine above to help us find the right app, press on its name, click on the button See Avaible Downloads and download the latest release of the APK by pressing the arrow key. In the new window that opens, click on Download APK to start the download; at the end, just open WSATools and proceed as seen in the previous chapter.
Although APKMirror is a safe source, always be cautious and scan APK files for viruses, especially if we also use other sites or other sources to obtain APKs.
The best alternative: BlueStacks
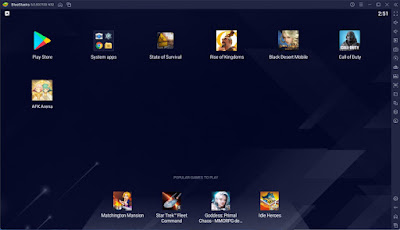
If we have Windows 10 as an operating system or we want to use an emulator with the integrated Google Play Store we can always install the program BlueStacks, in our opinion the best method to install Android apps on Windows.
By installing this program we will have a real platform to start any Android app by downloading it directly from the Google Play Store, including paid apps (by adding a Google account and a compatible payment method). The apps installed on BlueStacks can be added to the desktop and are accessible as shortcuts within the Start menu: in fact we will have the Android apps next to the Windows apps and we can start them without any difficulty.
BlueStacks also supports manual installation of APKs, so that we can add apps downloaded from the Internet or apps we are developing.
This great emulator for android was born to run game apps on PC, but nothing prevents you from installing other types of apps as well, such as WhatsApp your PC, Telegram o Messenger.
Conclusions
Support for Android apps on Windows 11 is currently experimental and reserved only for subscribers to the programma Insider Preview, without forgetting that it is also necessary to launch commands from the terminal in order to get full support for all apps. Instead, using a simple tool like WSATools we can immediately install the Android apps on Windows 11 without having to start the Insider Preview program and without too much tweaking, so that even inexperienced users can immediately try this interesting function of the new Microsoft operating system.
If we want support for the Google Play Store or want to try Android apps on Windows 10, we recommend that you install Bluestacks mentioned above, which remains one of the programs to install Android and its apps on Windows PC or even i best android emulators.
We haven’t installed Windows 11 yet due to compatibility issues? You will be pleased to know that, on our site, we can find a detailed guide for install Windows 11 on older PCs, bypassing all the checks provided by Microsoft.


