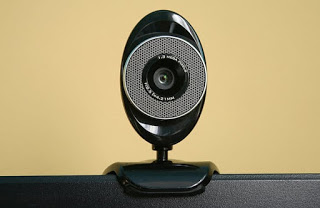
 In order to hold a video conference or to give online lessons to our students, we will need to have a good webcam, capable of taking quality images, without flicker and without that annoying “squared” effect, which often appears on apps that support video calls.
If up to now we have only used smartphone cameras to make video calls and we have never used a PC, here you will find all the information on how to configure a webcam on PC and Mac, so you can start working or giving lessons online right away.
In the first chapter we will show you which are the best webcams that we can install on a desktop PC or notebook, then we will find the chapters on how to configure the most common operating systems and enable the webcam for all the apps used.
Which webcam to use
Even if all notebooks have a webcam integrated in the body, I strongly recommend you to buy a dedicated one, so as to obtain a much higher video recording quality (often the quality of the integrated webcams is VGA, that is, a very poor video recording) . On fixed PCs the problem does not exist since we will always have to add an external webcam to be able to manage video calls and video conferences.
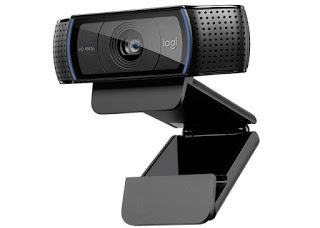
If we are looking for a good webcam we can take a look at the Logitech C920 HD Pro (70 €).
This webcam can be easily placed on the monitor or on the laptop screen, has a FullHD sensor with 1080p and 30 FPS shooting, dual microphone and automatic light correction system, so as to automatically adapt to any environment.
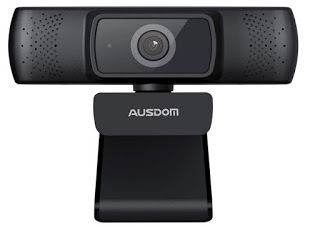
Alternatively we can spend something more for the AUSDOM Webcam 1080P Full HD (99 €).
With an elegant and refined design, it can be placed on the table or hung on the monitor / screen, has a 1080p FullHD sensor, dual microphones and integrated light correction system, so as to always have clear shots.
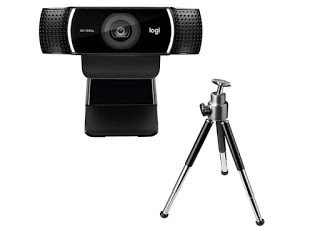
If we are looking for something highly professional we invite you to take a look at the Logitech C922 Pro Logitech C922 Pro (81 €).
This webcam is optimized for streaming transmissions and video conferences, has a comfortable tripod to be able to place it anywhere in the room and boasts a FullHD sensor with 1080p / 30FPS or HD 720p / 60FPS resolution, so you can choose whether to focus on quality pure or shooting speed.
All the webcams shown have a USB cable, so that they can be easily connected to a free port of the same name on the computer we intend to use.
READ ALSO: How to add microphone and webcam on PC for video calls
How to configure the webcam on Windows
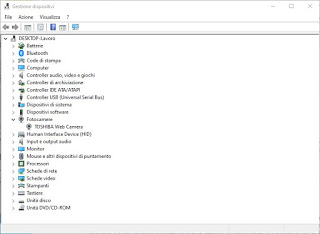
After connecting the webcam to the PC with Windows 10, it should be recognized automatically without using additional drivers, so that it can be used immediately. Once connected, wait a few minutes then check that the webcam works correctly by right clicking on the Start menu in the lower left, choosing the item Device management and expanding the peripherals present under the section Cameras.
In Windows 10 it is possible to see if the webcam is recognized by the system also in Settings> Devices> Bluetooth and other devices. You can try it with the Camera app to search on the Start menu.
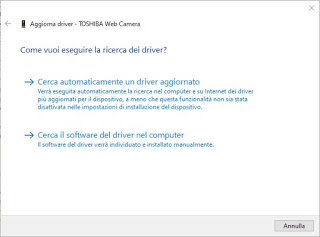
The name of the chosen webcam should be present, an evident sign that it is ready for use! If we don’t see the webcam in the section Camera or on it there is a yellow triangle, we press the right button on the webcam (if not even the name appears, we look up among the unrecognized devices) and we press on Update driver.
In the new window we press on the item Automatically searches for an updated driver to let Windows do all the work: the system will try one of the drivers already present and, if none is compatible, it will automatically start searching for new drivers on the Internet, using Windows Update for the purpose.
If not even so we solve insert the CD driver disk present in the webcam packaging, go back to the screen seen above, select this time the item Search the driver software on the computer and make sure to select the CD disk, so that the system can install the correct proprietary driver.
Alternatively we can always search for the right driver on Google, specifying the name of the product, the manufacturer and the operating system used; to deepen the search for missing drivers we recommend you read our guide In the case of unknown device how to find the right drivers.
READ ALSO: How to activate the webcam, test it and deactivate it when not in use
How to configure the webcam on Mac
On Mac and MacBook the webcam situation is much better, since the integrated webcams on the latest models are decidedly of high quality and work very well both with FaceTime and with other video conferencing and video-calling apps such as Skype.
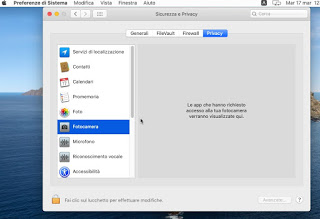
If we notice that the webcam does not appear or does not work on our Mac, we check that the app in question has the permissions to access the device by pressing the Apple icon in the upper left corner, clicking on System Preferences, then on Security and Privacy -> Privacy and finally we press on the voice Camera.
In the screen on the right all the apps with access to the webcam installed on the Mac will appear: make sure that all the apps have permissions to be able to make video calls.
If suddenly the Mac webcam stops working, we advise you to restart the system and see if the situation improves.
Conclusions
With the indications that we have provided you should be able to configure the webcam on any computer in a simple and fast way, so that you can open any app for video calls or video conferences (very useful for those who work from home or for those who teach online remotely).
If we do not know which programs to use for smart working or for making video conferences, we can continue reading on our guides How to make group video calls for free without limits is Smart working programs for working from home.

