READ ALSO -> How do you infect your PC with viruses by surfing the internet
How to create a USB stick with antivirus
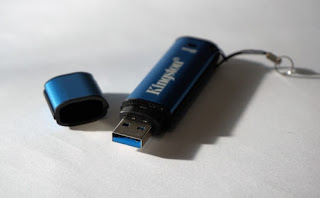
The procedure to follow is all in all very simple, but it is advisable to follow all the steps indicated in the chapters below and get a healthy and infection-free PC so that we can safely prepare the USB stick to be used as an emergency antivirus. If we do not have a USB key to dedicate to this purpose, we invite you to read our guide Best USB sticks to buy: the fastest, cheapest, biggest.
Download the program to create a bootable USB
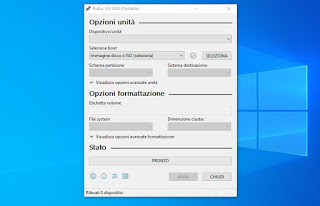
On the healthy Windows PC started for the occasion we must immediately download the program to create USB sticks that can be booted with the system; there are many programs dedicated to the purpose but the best of all is without a doubt Rufus, downloadable for free from the official website.
This program (also available in a portable version without installation) is ideal for transfer the contents of any ISO image to the USB stick, especially the Boot CD images created by cybersecurity companies to be able to scan and remove viruses for free.
Once downloaded, all we have to do is connect the USB key chosen for the operation (obviously empty, without any important file inside) and check that it is recognized by the program so that we can continue with the next points of the guide.
To discover other programs similar to Rufus we invite you to continue reading our article Programs to burn ISO to USB.
Download the Boot CD ISO with the antivirus
Now that Rufus and the USB stick are ready for operation, we can download one of the Boot CDs provided by the companies that produce powerful antivirus. The best Boot CD ISO images that we can download to scan on boot the computer are listed below:
- Kaspersky Free Rescue Disk
- Avira Rescue System
- Trend Micro Rescue Disk
- Comodo Rescue Disk
- Dr.Web LiveDisk
- ESET SysRescue
All ISO images seen in the list above are free and have no license fee for use. Before preparing the USB stick with the antivirus we strongly advise you to connect the blocked and/or infected PC to the modem via Ethernet cable, so that we can benefit from the Internet connection when we open the recovery environment and download the latest virus signatures (it is not possible to use Wi-Fi, always use the cable). If we do not have an Ethernet cable to exploit, we can also equip ourselves with a long 20-meter Ethernet cable, available on Amazon for less than € 15.
Other useful scanning tools on Windows can be viewed in the article Portable Antivirus & Emergency Virus & Malware Scanners: Top 10.
Transfer the ISO image to a USB stick
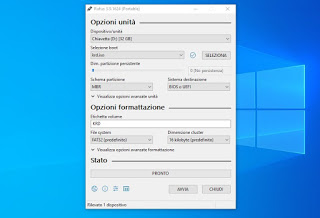
Now that the ISO image is ready, let’s open the Rufus program, we select the USB key to use in the field Device/unit, we press the button SELECT and we browse through the computer folders until we find the ISO image downloaded a little while ago.
For maximum compatibility with all computer systems, make sure it is active MBR under the heading Partition scheme and that it is set FAT32 under the heading File System; we leave all the other items and buttons unchanged, considering that the basic settings of the application are sufficient to create a good bootable key with any type of ISO. In order to create the actual key we press down on START and we wait for the program to transfer all the data from the ISO to the key.
Conclusions
As soon as the USB stick with the antivirus is ready, insert it into a free USB socket on the blocked or infected computer, then let’s change the boot order of the system immediately after pressing the power button. As soon as we arrive in the Rescue Disk recovery environment, we update everything necessary and start the complete scan of the computer, by pressing the button Scan or similar. At the end of the scan, restart the PC and remove the key: the computer will start again without problems and without any symptoms of infection!
If the PC no longer starts up even after launching the antivirus from the USB, it’s worth it to recover important data, save everything and reinstall Windows again, as seen in our guide How to Format Windows 10.
Do we also want to use a USB stick to format Windows 10? In that case, we recommend that you read our article How to install Windows 10 from USB.


