
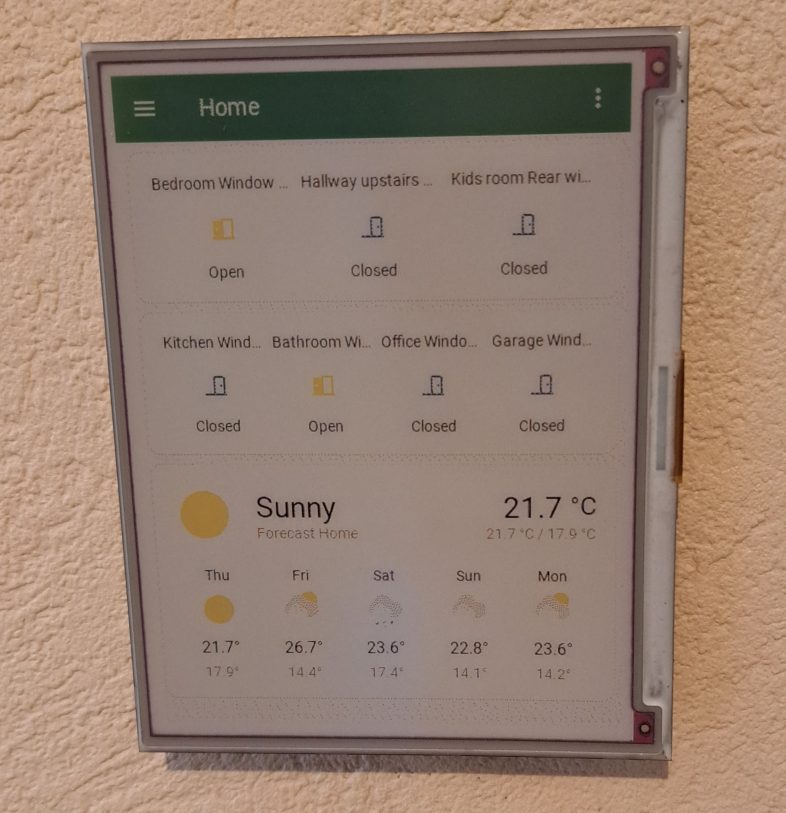
Think of an innovative solution that allows you to freely and deeply customize the operation of digital framesdisplays from various manufacturers and screens e-ink. All these products can perform specific functions, transforming themselves into smart calendars for the home and office, displays for meeting rooms, smart thermostats, industrial dashboards, advertising screens and much more.
FrameOS it is a platform designed to run on the Linux kernel: at the moment it is a binary application but, as the author explains, it can in fact be considered a real operating system. On the other hand, also the same Android doesn’t it work on Linux kernel at all?
The project requires installation on Raspberry Pi OS Lite (therefore without desktop environment): once this step is completed, however, it allows you to customize in full the behavior of connected display.
What is FrameOS and how does it work
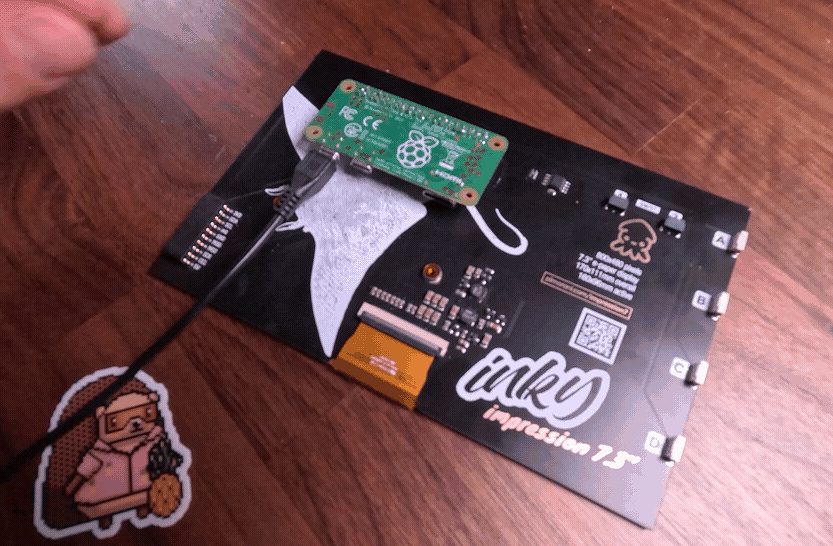
Marius Andra, creator of FrameOS, says that the product was born with the precise objective of personalizing a person’s behavior display e-ink connected with a Raspberry Pi Zero W board. It then evolved into a widely versatile and flexible tool, capable of “driving” a wide range of devices that can be used, for example, to display information coming from sensors or from devices for the Internet of Things (IoT).
To start using FrameOS, you need to install FrameOS Controller and then configure the card Raspberry Pi, following the specific guide for your screen. Many models of e-ink display, output are supported HDMI (framebuffer) and kiosk mode via web server.
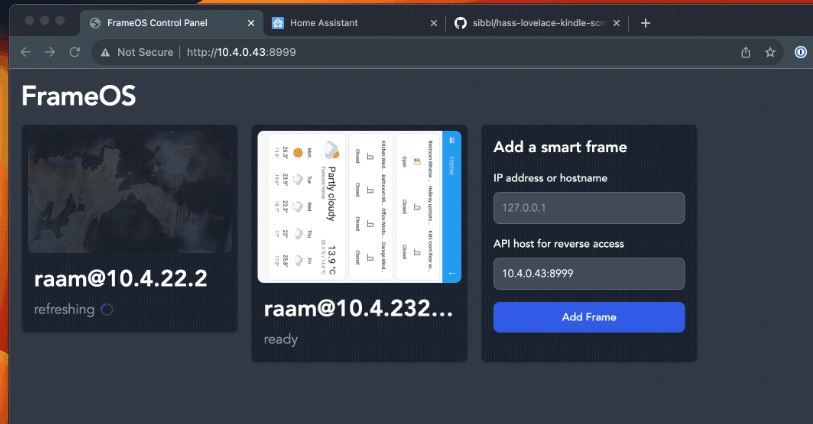
FrameOS Controller is the application that allows you to deploy FrameOS on individual devices. Once the software is loaded, the displays no longer require the controller to function, although it may be useful to keep the software component active for log processing purposes.
The FrameOS system is available as Docker image, continuously updated and improved by the developer. The advice is to buy a Raspberry Pi Zero 2 Wwhich offers a good compromise between performance, power consumption and size.
Installation on Raspberry Pi and using the connected screen
After downloading and installing Raspberry Pi OS Lite via Raspberry Pi Imager, it is important to change the settings when prompted making sure you set the hostname and WiFi credentials correctly. There SSH key must be copied from the settings page FrameOS Controller.
By connecting the Raspberry Pi board with the screen to be managed, the devices will begin to communicate with each other: at this point you are ready to run FrameOS and install apps you want.
Once activated, FrameOS takes control of the entire system, it has its own folders apps e drivers, effectively behaving like an operating system. The type interface drag-and-drop allows you to combine applications written in the Nim language to form “scenes”. It’s possible edit apps existing ones or create new ones to adapt them to your needs.
Nim it is a programming language general-purpose designed to be efficient, expressive and flexible. Its development began in 2005 with the aim of providing an efficient solution capable of inheriting the best features of other popular languages, such as Python, Ada and Modula-3.
FrameOS itself is developed using the Nim programming language in order to focus on efficiency and performance, native compilation, interoperability, ease of writing and modifying code. FrameOS also supports the GPT-4 generative model: Using it, you can use artificial intelligence to write and debug applications.
The images published in the article are taken from the project’s official website.