
WireGuard is a high-performance and advanced protocol that allows you to set up VPN connections safe and fast. Designed by Jason A. Donenfeld, it aims to be simpler, more secure and more efficient than other VPN protocols, such as OpenVPN and IPsec. WireGuard VPN it is increasingly implemented in the operating system kernel (in Linux, at least, it is…): this contributes to its efficiency and speed.
As we have seen in many of our articles, WireGuard itself is not based on aclient-server architecture traditional. The operating scheme of WireGuard is in fact of type peer-to-peer: The devices that establish a VPN connection are called “peers” and each of them uses a private key and a public key. The basic idea is that every peer can communicate directly with every other peer within the network. WireGuard peers can communicate with each other without necessarily going through a centralized server.
However, it is possible to implement an architecture that includes a centralized server to manage key distribution, initial setup, and other WireGuard features. In this configuration, the server plays a coordinating role and facilitates theinitialization of connections between peers, but once connections are established, data can flow directly between peers without passing through the server.
WireHub: Generate client and server configurations for WireGuard VPN
WireGuard is a Innovative VPN protocol which revolutionized the way virtual private networks are designed and implemented. Presented at the beginning of November 2023, WireHub is configured as a platform that aims to further simplify the use of WireGuard, making the configuration of VPN networks an efficient and accessible experience.
Using WireHub, users can generate easily WireGuard configurations to set up and deploy your own VPNs. This eliminates the need to exchange configuration files via email or other channels, greatly simplifying the process of setting up your secure network.
The platform supports the key generation, including private ones, directly in the browser, also allowing the possible import of pre-existing keys. WireHub never receives or stores passwords or private keys because the entire procedure is managed dynamically on the client side.
WireHub allows you to define access rules based on labels to define the peering between network devices. The peering refers to creating a direct and secure connection between two network devices. The labels they are useful for framing the rules that cover the various needs of peering (mutual identification of devices), the possible definition of addresses Allowed IPsthe use of a shared key to guarantee the security of the connection (PreSharedKey).
Thanks to WireHub it is also possible invite users which must be able to connect to the WireGuard VPN by configuring them as Guests, Members, Managers o Administrators. This role management system simplifies the distribution of responsibilities within the network.
How to use WireHub
To make it easy to generate WireGuard VPN configurations with WireHub, simply go to the platform’s home page then click Signup and log in with a social account (traditional registration will also be available in the future).
By way of example, WireHub offers three by default rent a VPN preconfigured, marked with different names.
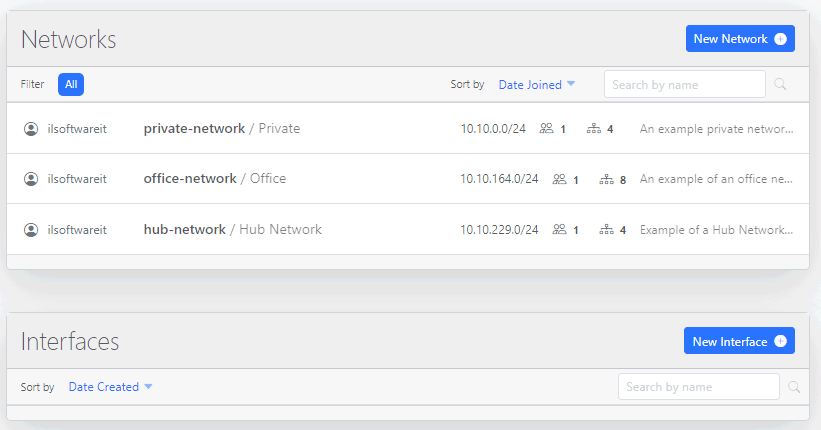
With one click your New networkyou can set up a new WireGuard VPN network by giving it a name and defining the local IP address range (CIDR) to be assigned to the devices that will connect to it (for further information, we suggest also referring to the concept of subnet mask). In the appropriate box, you can also define a DNS server that the WireGuard peers will use for domain name resolution.

Set the network (button Create), you can add the first device authorized to establish a connection. Suppose you first configure your personal notebook: with a click on New Deviceyou can specify its name, assign it for example to a certain team and tick the box Assign to me.

The following step consists in indicating the public key associated with the device on which WireGuard is installed. You can also have this key generated automatically by WireHub: just click on Import or generate. In this case, a personal password must be specified to be used to protect the private key, which is also created within the web browser.
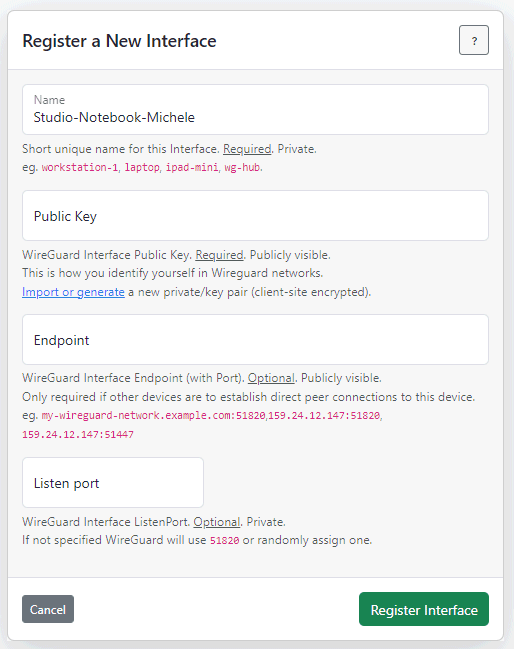
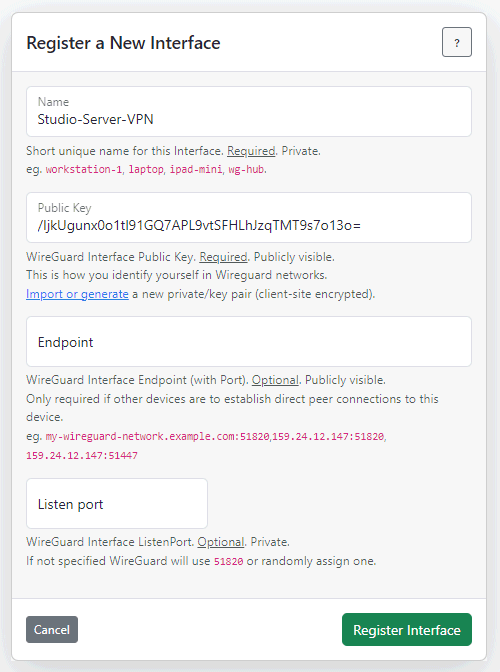
As a last step you need to click on the button Encrypt: The public key will appear in the field Public key in the box Register a New Interface.
The button Register Interface it allows to register the device which must then be able to connect to the WireGuard VPN.
Registering a WireGuard server device
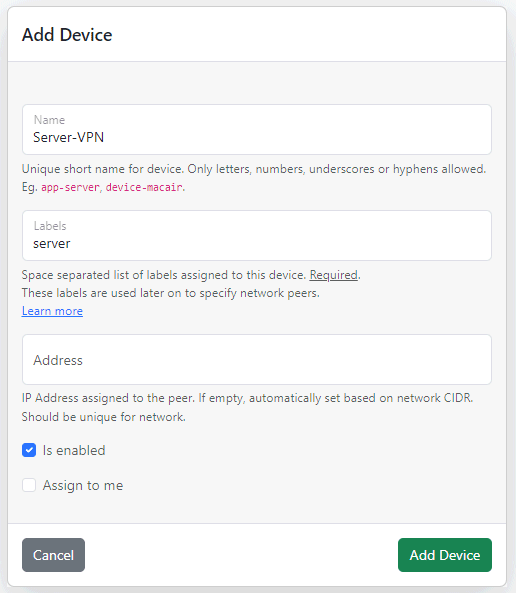
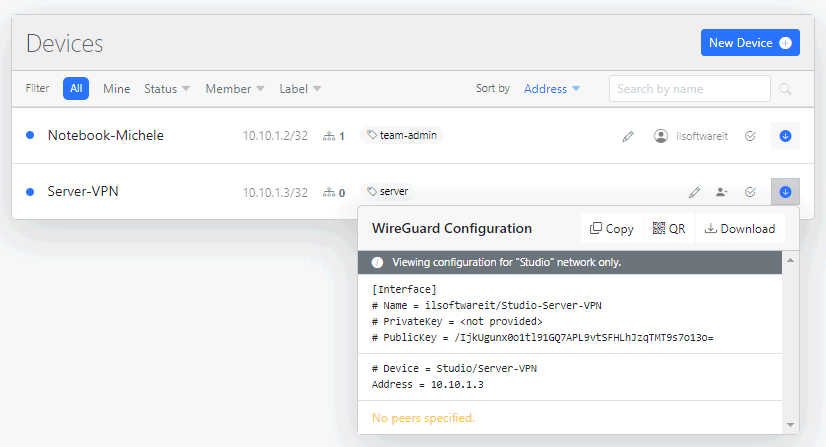
Likewise, clicking the button again New device at the top, you can add an additional device that acts as server WireGuard, in the sense described at the beginning. We enter relevant descriptors, as in the image below and click on Add Device without checking the box Assign to me.
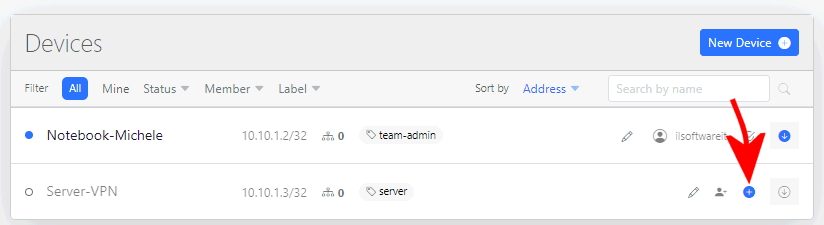
The server is shown in the list of devices: to continue, you need to click on the blue “+” button at the bottom left then on Add interface. A box will appear Register a New Interface like the one encountered previously.
Configure the machine that plays the role of WireGuard server
Suppose we have a car available Debian Linux (or derivative, for example Ubuntu) to use as a server. First of all, it is necessary install WireGuard: You can do this simply by typing the following in the terminal window:
sudo apt install wireguard -y
The following command allows you to generate a WireGuard key pair:
wg genkey | tee privatekey | wg pubkey > publickey
The private key is saved in the file privatekeywhile the public key inside the file publickey. The public key will be used to identify the server by other peers or nodes on the network, while the private key will be kept secret.
The public key viewable with the command cat publickeyit must be copied and pasted into the campo Public Key of WireHub. In the field Endpoint you must take care to specify the public IP address and the communication port on which WireGuard is listening.
The command must also be issued on the Linux machine sudo apt install resolvconf -ya set of scripts and tools that manages the configuration of DNS servers on your system.
Configuring connection settings
With one click on the button Editto the right of Connections, you can define the connection settings. As mentioned above, connections are managed based on labels. In the following example the members of team-admin can connect to the Linux server machine.
In addition to allowing the entry of IP addresses and CIDRs, the Allowed IP It also supports several keywords, such as peers, network e all.
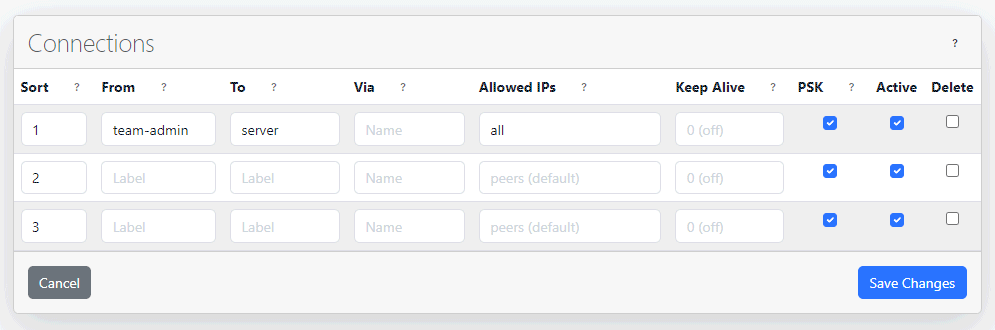
Once clicked Save changesyou can open the settings file with the arrow at the right end of the server device field and click “Download” to download it.
The contents of the configuration file exported from WireHub must be saved on the Linux machine as a file /etc/wireguard/wg0.conf. At this point you can start WireGuard:
wg-quick up wg0
The command wg show wg0 allows you to determine whether WireGuard is running correctly.
WireGuard client configuration with WireHub configuration files
By clicking on the button Download to the right of the previous device added in WireHub, you can download the corresponding configuration file. To download it you must indicate the password specified previously to protect the private key.
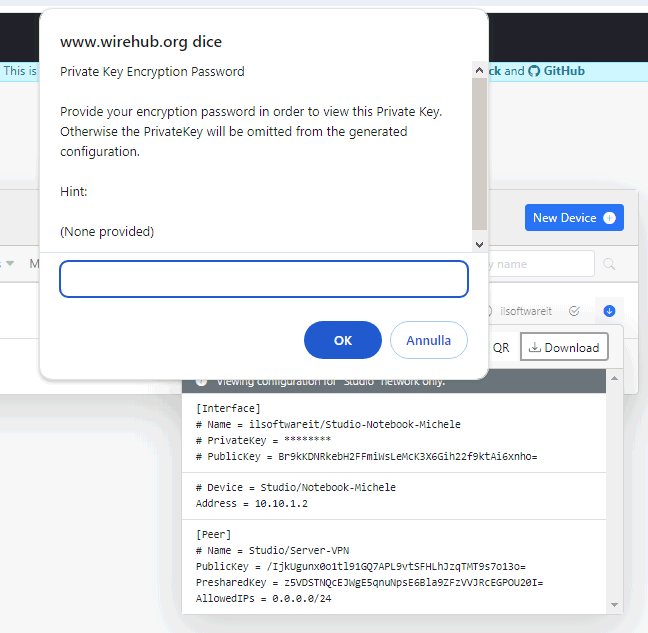
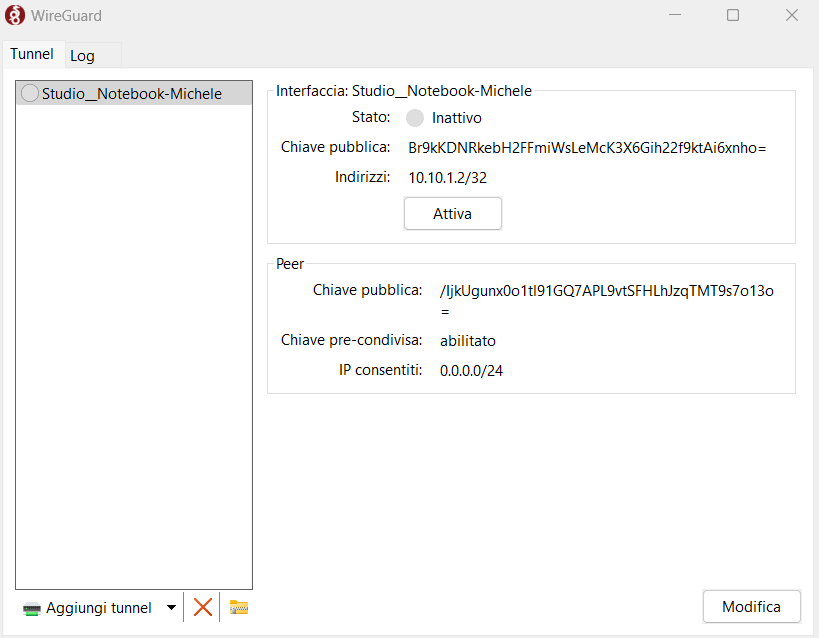
After starting the client WireGuard on your device, you need to click the button Import tunnel from file then provide the file .conf previously downloaded from WireHub.
Once the settings are imported, you need to click Activate to connect to the WireGuard VPN you just set up.
Add new peers and create invitations
By setting up a new device on the WireHub home screen, you can assign the peer to another person, define a role e…