In this guide, we will show you how to best use Disk Management in Windows to create partitions, resize volumes, format disks. Before trying other programs we always advise you to start with this tool: being well integrated with the system, it will provide you with a much higher level of security in moving data than any other free program to manage disks.
How to use Disk Management in Windows
In the following chapters, we will show you all the main operations we can perform on a disk or on an SSD with the Windows integrated tool. We advise you to always act on new internal or external disks (not yet formatted) connected to a PC with Windows 10 already installed and avoid touching the partitions where Windows is present or its boot files.
Create a new partition
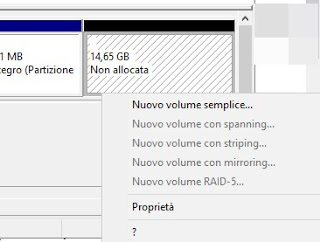
Creating partitions with the integrated tool, especially if we have an empty external USB disk to fill or a new internal disk to configure, is very simple: we connect the disk to our computer, we start Windows, we right-click on the Start menu at the bottom left, we press on Disk management, we identify at the bottom the disk on which to create the new partition, we press with the right mouse button on an empty point (identified as Unallocated) and select New simple volume.
In the presentation window we press on Come on, we choose the size that the partition must have (based on the available or remaining space), we press again on Come on, we immediately assign a drive letter to be able to immediately view the partition in Windows resources and press again on Come on to open the most important window.
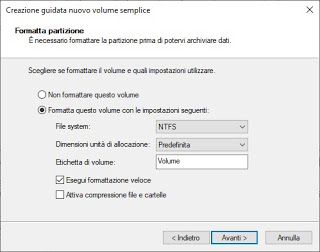
Let’s make sure we put the checkmark on Format this volume with the following settings, so we choose NTFS as a file system, default as the size of the allocation unit, we choose a name to give to the new partition, check the item Perform quick format then we press on Come on is end to confirm the operation.
Delete unused partitions
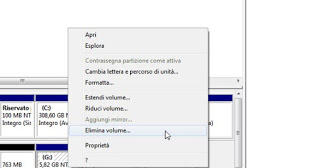
To delete a partition from among those on a disk, open the tool Disk Management, we press with the right key on the partition to delete then we use the entry Delete volume.
A confirmation window will appear before performing the actual deletion. For security reasons, Windows does not allow you to delete Windows system and boot partitions, thus preventing unwary users from “deleting Windows”.
Resize a partition
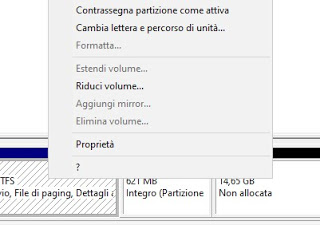
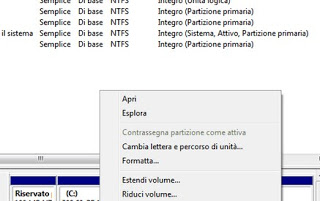
If we want to resize a partition already present on a disk (so as to have new space for another volume) we right-click on the Start menu at the bottom left, open the tool Disk management, we right-click on the partition to resize and select the item Reduce the volume.
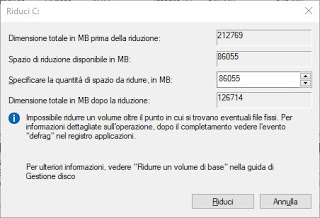
The system will calculate the reducible space, based on the data and files already present in the same partition (we advise you to act on fairly empty partitions, so as to carry out more efficient resizing). Immediately after the check, we will be shown a window with the maximum size that we can reduce without touching the fixed files.
We make the choice in the field Specify the amount of space to be reduced in MB, then press on the button Reduce below to make changes. The new space created by the reduction will be created as Unallocated, then available to host a new partition.
To reintegrate the reduced space we previously delete the created partition, we press with the right button on the partition to extend then we use the entry Extend volume.
Format partition
The last operation we will show you concerns the formatting of a partition in another file system, useful when we need to increase the maximum size of the files stored (which with FAT32 is limited to 4GB) or if we need to prepare a partition to host large files. We open our faithful tool Disk Management selecting it from the menu available with the right button on the Start menu, we always press with the right button on the partition to convert and we use the item Format.
A window will open where you can choose the format to use: to accommodate files of any size we recommend you choose NTFS or exFAT as a file system. Now we will only have to put the checkmark on Perform quick format and confirm on end.
As seen previously this operation is blocked for system partitions, to avoid making trouble with the fundamental Windows partitions.
Conclusions
As we have seen, using Disk Management on Windows 10 is very simple, to the point that even a novice user with a hard disk formatting will find everything they need to use the new disk right away, avoiding messes.
Still, on the same subject, we can read our guide on how Initialize and format new or unrecognized disk (Windows).
If instead, we want to create a dual boot between two different systems (Windows or Windows + Linux), we invite you to read our guide on how to Install Windows 7 in dual boot on Windows 10 PC.
Do we want to use a third-party program to manage partitions? In this case, we recommend using the programs in our article on Programs to create disk partitions (for dual boot or security).

