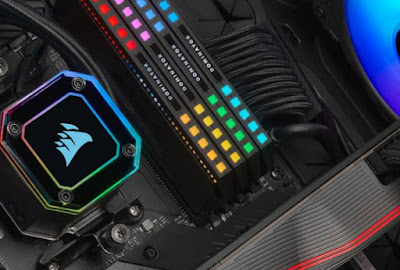
 If the desktop computer gets too hot during the summer period or we notice a drop in performance due to too much heat (a phenomenon known as Throttling), probably the air cooling system is no longer sufficient to cool it and it is necessary to focus on a liquid cooling system, obtainable through a liquid heat sink connected to a pump and a radiator (to be mounted on the computer case, where there are outlets for the fans).In the following guide we will show you the advantages and disadvantages of using a liquid cooler, what are the best models that you can buy online on Amazon and how to mount them on our computer, always paying the utmost attention (since we will have to deal with liquids in close contact with electrical circuits).
READ ALSO -> How to keep the laptop cool
Advantages and disadvantages liquid cooler
The advantages of mounting a liquid cooler on our desktop PC are numerous, as visible in the list available below:
- Better cooling: the liquid in contact with the heatsink removes the heat from the CPU better, significantly lowering the operating temperatures even in summer (CPU always with temperature under control).
- Longer CPU life: If the processor is cooled better it will not suffer the damage caused by too much heat, thus lasting on average longer than the same air-cooled processors.
- Secure overclocking: if we want to increase the frequency of our CPU we can do it in complete safety, since with liquid cooling the margins for overclocking are much higher than with air cooling.
- Maximum power for games: if the chosen game uses a lot of CPU (to manage NPCs for example), having a well-cooled processor will allow you to push the game settings to the maximum without having to compromise due to the temperature reached during the games.
Unfortunately, the liquid cooler on a PC also has disadvantages, to keep in mind before proceeding with this step. The disadvantages of liquid dissipation are:
- More noise: Compared to air-cooled systems, liquid dissipation is noisier, as there is always an active pump to run the coolant and two or more fans on the radiator. Only some budget models manage to perform well without a dedicated pump, thus generating little noise.
- Liquid leakage risk: water runs in the liquid heatsink, which can very well escape from the joints of the pipes, from the radiator and from the heatsink itself, irreparably damaging the components of the PC where it drips (as well as increasing the risk of fire and electrocution).
- Higher cost: A liquid cooling system for PC gaming costs a lot. Fortunately, there are also inexpensive and easy-to-assemble models for home PCs intended for gaming or very heavy CPU loads.
Only after having carefully weighed the advantages and disadvantages of this technology can we continue reading the guide, where we will show you which are the best models that you can buy on Amazon, the best store for PC components also given the presence of 2-year reliable guarantee.
Mount a liquid sink
A liquid cooler is made up of very precise elements, which should be known before buying a specific model. A liquid cooler has the following components:
- Heatsink
- Liquid pump
- Cooling radiator
- Radiator fans
Based on our cooling needs we choose a liquid cooler with a single fan, two fans or three fans, also choosing according to the type of houses available to us. After choosing the heatsink to mount we remove the socket, remove the side panel of the case, identify and let’s remove the old air cooler (a fan with metal fins underneath), also paying attention to the fan cable (FAN_CPU, connected to the motherboard).
After removing the old heatsink, we clean the surface of the processor with Isopropyl Alcohol to remove the old thermal paste then we apply the new thermal paste, purchasing a new tube such as the ARCTIC MX-5.
With the permic paste applied to the surface of the CPU we connect the new heatsink, then we find a place for the radiator and any pump, using the screws provided in the box of the chosen heatsink.
The last step is to connect the CPU fan cable (CPU-FAN) to the dedicated socket on the motherboard again and try to see if everything starts: better to do this test with the case open, so that you can intervene in case of problems. For larger heatsinks you may need multiple connections on the motherboard or a dedicated connection from the power supply, so as to be able to power the pump or any LED lights.
To learn more we can also read our guide How to change fans on your computer.
Best easy to assemble models
After carefully evaluating whether or not to mount a liquid cooler, let’s see together the best models available for modern PCs, so as to be able to better cool any modern processor, especially on PCs intended for gaming or advanced graphics processing.
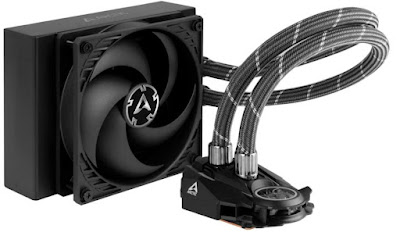
The first liquid cooler that we can consider is theARCTIC Liquid Freezer II 120 for only 70 €.
This heatsink is compatible with the latest generation Intel and AMD processors, has an integrated PWM controlled pump, a variable speed fan (200-1800 RPM) and a hermetic system, so as to minimize any risk of liquid leaking from the system.
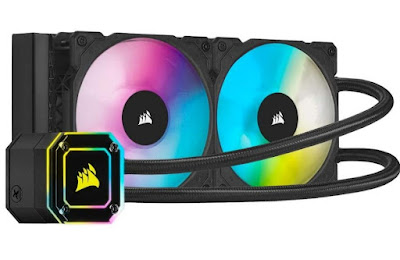
If, on the other hand, we are looking for a heatsink with two fans, we can focus on Corsair iCUE H100i ELITE CAPELLIX from 140 Euro.
On this heatsink we find 33 Bright (software-controlled) CAPELLIX RGB LEDs, two PWM-controlled 120 mm RGB fans, fan speeds from 400 to 2,400 RPM, Zero RPM Mode and dedicated iCUE Commander CORE system.
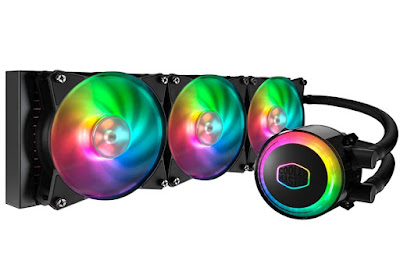
For those who have space in the case, it is possible to immediately focus on a three-fan heatsink like the Cooler Master MasterLiquid ML360 from 120 Euro
This heatsink features an independent LED illuminated 360mm radiator, Dual dissipation, low profile dual chamber pump, Cooler Master MasterPlus + software (for LED control) and PWM fan control system.
Conclusions
Assembling a liquid cooler can be an important step in upgrading your gaming PC or for computers dedicated to heavier tasks, but it requires a minimum of experience with disassembling the internal components of the computer. If we are not practical, it is advisable to ask for help from a technical friend or to contact an expert professional, so that we can quickly assemble the chosen heatsink.
To stay on the subject of PC cooling, we can also read our guides How to change the fan speed in Windows 10 and How to have a silent PC.


