 Those who often travel with a laptop equipped with Windows as an operating system connect to different Wi-Fi networks depending on where they are; a traveler user must therefore necessarily know where the wireless connection management optionsto be able to configure them in the right way.
The settings in Windows on internet connections are important to understand and use, above all to stay connected safely, without risking that strangers can spy on our activities and what we do on the internet.
In the guide that follows we will show you how manage Wi-Fi connections on Windows 11 and Windows 10so you can choose which network to connect to, how to check configuration addresses, how to change the network profile, how to add connections manually and how to set traffic restrictions.
READ ALSO -> Wi-Fi not detected, why and how to fix
Make a Wi-Fi connection
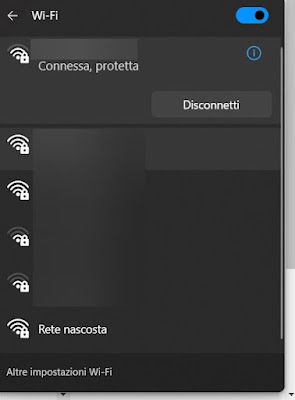
To connect the Windows 11 PC to a Wi-Fi network all we have to do is click on the Wi-Fi icon near the clock at the bottom right, activate the button Wi-Fipress the arrow next to it and connect to the network for which you know the access password.
How to connect if the Wi-Fi icon is not visible
It may happen that the Wi-Fi icon is not visible and therefore it is not possible to activate a Wi-Fi connection; in this case we can still connect from the Windows settings, which in fact offers all the necessary functions to adjust the connection to the Wi-Fi.
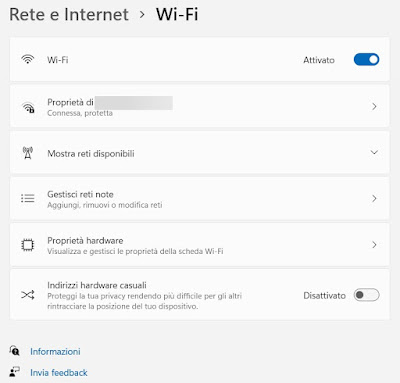
On Windows 11 we press the keys WIN+I on the keyboard, let’s go to the menu Network and Internetwe press on the menu Wi-Fiactivate the button at the top Wi-Fi and finally press on the menu Show available networks.
On Windows 11 the Wi-Fi icon is always present and cannot be disabled, moved or hidden; to restore the Wi-Fi icon at the bottom right on Windows 10 let’s take the path Settings -> Personalization -> Taskbarwe press on the item Enable or disable system icons and turn on the switch next to the item Net; in the same path seen a little while ago we press on Select the icons to be displayed on the taskbar and let’s make sure that Net is active.
How to manage known Wi-Fi networks
If we want to delete the Wi-Fi password of the network to which we have connected in the past we can use the dedicated Windows menus, without having to go to the Control Panel.
On Windows 11 we can manage known Wi-Fi networks by taking us to the menu Settingsby pressing on Network and Internetby pressing on Wi-Fi and selecting the menu Manage known networks.
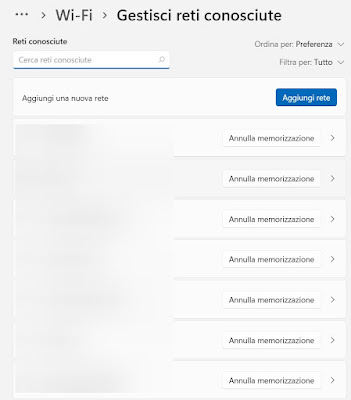
On Windows 10 we can manage known Wi-Fi networks by taking us on the path Settings> Network and Internet> Wi-Fi and pressing on the item Manage Wi-Fi settingsin order to access the list of Wi-Fi networks to which we have connected in recent years.
Change profile from public to private (and vice versa)
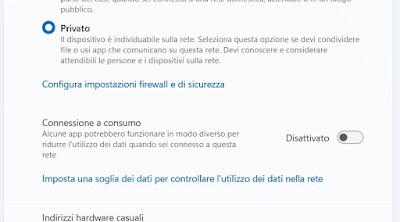
When we are connected to a public Wi-Fi network, it is advisable to set the public profile, so as to prevent access to shared folders and protect the computer from hackers; vice versa when we are connected to the home Wi-Fi network it is advisable to set the private profile, so as to make the PC visible on the network (including shared folders).
To change network profile on Windows 11, press WIN+I on the keyboard, let’s take the path Network and Internet -> Wi-Fi -> Properties of (network name) and make sure to activate the profile we need Publish o Private).
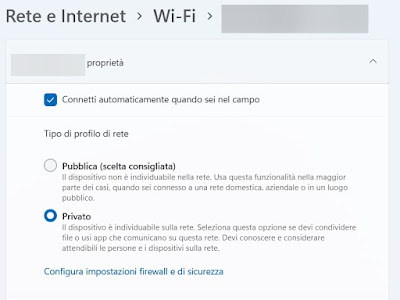
On Windows 10 we can change the profile of the active network at that moment by taking us on the path Settings -> Network and Internet -> Statusby pressing the key Property under the name of the network in use and selecting the profile to use.
Set up a metered connection
If we are connected to the phone hotspot Android oriPhonewe can prevent Windows from downloading too much data (and looking for updates) and thus preserve the traffic of our data connection.
To set up a metered connection on Windows 11, press WIN+I on the keyboard, let’s take the path Network and Internet -> Wi-Fi -> Properties of (network name) and activate the switch next to the item Connection according to consumption.
On Windows 10 the procedure is very similar: let’s take the path Settings -> Network and Internet -> Statuswe press the button Property under the name of the network in use and activate the switch under the item Set as a metered connection.
Change IP and DNS server assignment
The IP address and DNS servers are automatically assigned by the modem or router to which we are connected via Wi-Fi; therefore normally we do not have to change anything, but if we have problems navigating or want to change IP or DNS we can act directly from the PC settings, without having to access the modem configuration panel.
To change IP and DNS server assignment on Windows 11 let’s go to the path Network and Internet -> Wi-Fi -> Properties of (network name)scroll through the window until you find the items IP assignment e DNS server assignment and press on the keys Edit next to them to proceed with the required changes.
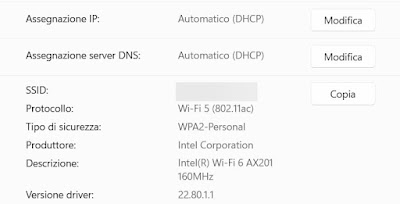
To learn more we can read our guides on how to see the IP address on PC e how to change DNS on Windows.
How to activate Windows hotspot
Those who own a computer connected via an Ethernet cable and have a Wi-Fi module can use the latter as if it were a router and thus connect the wireless devices nearby, without having to use range extenders or other similar systems.
To activate the hotspot on Windows 11, we press on the now well-known shortcut WIN+Ilet’s open the menu Network and Internet and turn on the switch next to the item Hotspot mobile.
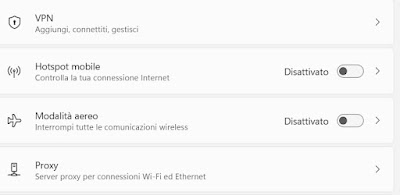
To activate the hotspot on Windows 10 let’s take the path Settings -> Network and Internet and press on the menu Hotspot mobile to activate the function and to change the network settings.
Troubleshoot network problems
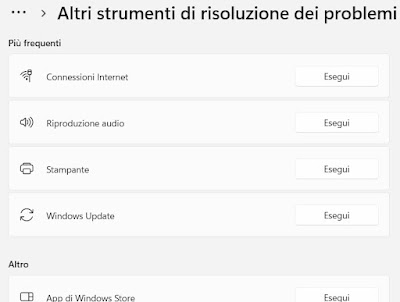
If the Internet does not work or the Wi-Fi connection creates problems, we can quickly restore it using the recovery tools built into Windows, excellent for immediately solving any connection or configuration problem without having to format the whole system.
To solve network problems on Windows 11 we press the keys WIN+Ilet’s open the menu Systemwe select the menu Other troubleshooting tools and click on the Run button next to the items Internet connections e Network card.
Conclusions
Compared to Windows 7 and Windows 8.1, managing Wi-Fi connections has become much easier, since we will no longer have to go through the Control Panel (still present on Windows 10 and Windows 11) to change the IPs, to check the type connection, manage the Wi-Fi networks to which we have already connected or to activate the advanced functions related to modern Wi-Fi cards.
To find all other network options, please read our guide to Windows Network and Sharing Center.

